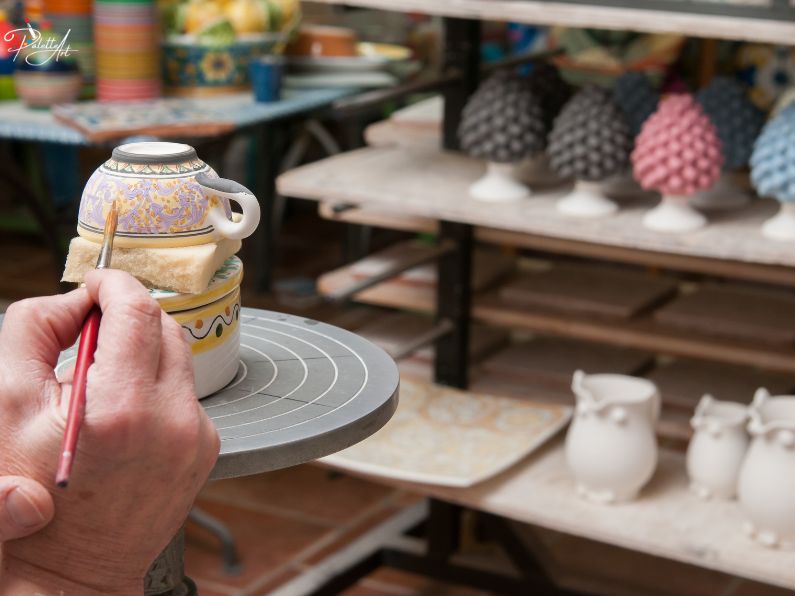
Dot painting, also known as pointillism, has gained popularity as an artistic technique for embellishing ceramic pieces. In this comprehensive guide, we’ll explore various aspects of dot painting on pottery, from techniques to creative ideas that will inspire your next project.
Contents
Understanding Dot Painting Techniques on Pottery
Dot painting involves creating intricate designs using small, distinct dots of color. This technique can transform simple pottery pieces into vibrant works of art. Let’s delve into the key techniques you’ll need to master for successful dot painting.
Creating Perfect Dots
The foundation of dot painting lies in the ability to create precise, uniform dots. Here’s how you can achieve this:
- Tools: Use the handle of a paintbrush, a dotting tool, or even a toothpick to create dots of various sizes.
- Technique: Dip the tool into the paint and dot it onto the pottery surface with a steady hand.
- Variety: For smaller dots, use a cocktail stick or a fine-tipped tool. Experiment with different tools to find what works best for your desired dot size.
- Layering: Create depth and interest by layering colors. Let each layer dry before adding another to prevent smudging.
Exploring Gradients and Shapes
Beyond simple dots, you can create stunning effects by experimenting with gradients and shapes:
- Gradients: Achieve a gradient effect by varying the pressure and size of your dots. Start with larger dots and gradually decrease their size.
- Shapes: Combine dots to form intricate patterns and shapes. Use clusters of dots to create flowers, mandalas, or abstract designs.
Dot Painting Pottery Designs Ideas

Once you’ve mastered the basic techniques, it’s time to get creative. Here are some ideas to inspire your dot painting projects.
Geometric Patterns
Geometric patterns are a popular choice for dot painting. Their structured symmetry can be both mesmerizing and soothing to create.
- Designs: Experiment with triangles, squares, hexagons, and concentric circles. These shapes lend themselves well to the dot painting technique.
- Symmetry: Use evenly spaced dots to maintain symmetry. Consider drawing guidelines on your pottery piece to help with placement.
Floral Designs
Floral motifs are another excellent choice for dot painting. These designs can range from simple to complex, depending on your skill level and patience.
- Flowers: Dot various flower shapes, such as daisies, roses, and lotus flowers. Each petal can be formed by a series of dots.
- Leaves and Vines: Complement your floral designs with leaves and vines. Use different shades of green for a realistic effect.
Abstract Art
If you prefer a more freeform approach, abstract dot painting allows for endless creativity.
- Colors and Shapes: Play with a mix of colors, shapes, and patterns. Abstract art doesn’t follow any rules, so let your imagination run wild.
- Textures: Experiment with different textures by varying the size and density of your dots.
Modern Geometric Abstract Effect
For a contemporary twist on traditional dot painting, try incorporating modern geometric abstract effects into your designs.
- Minimalist Symmetry: Minimalist designs often focus on clean lines and simple shapes.
- Mandala Patterns: Create mandala patterns using evenly spaced dots. These designs can be both meditative and visually striking.
- Cosmic Patterns: Dot patterns that mimic celestial bodies or cosmic phenomena can add a modern, mystical touch to your pottery.
Asymmetry and Chaos
For a more dynamic and unconventional look, embrace asymmetry and chaos in your designs.
- Irregular Dots: Place dots irregularly to create a sense of movement and energy. This approach works well for abstract art.
- Dynamic Designs: Combine different colors and dot sizes randomly for a vibrant, chaotic effect.

Preparing Pottery for Dot Painting
Preparation is key to ensuring your dot painting adheres well and looks its best. Follow these steps to prepare your pottery piece:
Surface Preparation
Start with a smooth, clean pottery surface. This ensures that the paint adheres properly and your dots look crisp.
- Cleaning: Wash the pottery piece to remove any dust or oils. Dry it thoroughly.
- Priming: If necessary, apply a primer to help the paint stick better. Some pottery surfaces might require a light sanding for better adhesion.
Base Coat
Applying a base coat can enhance the final appearance of your dot painting.
- Color Choice: Choose a base coat color that complements your dot painting design. Light colors often work best as they make the dots stand out.
- Application: Apply the base coat evenly and allow it to dry completely before starting your dot painting.
Practice First
Before you start on your actual pottery piece, it’s a good idea to practice your dot painting techniques.
- Test Surface: Use a separate piece of ceramic or a practice sheet to get comfortable with the tools and techniques.
- Refinement: This practice will help you refine your skills and gain confidence in your dot placement.

Conclusion
Dot painting on pottery is a relaxing and rewarding artistic endeavor. With the right techniques and a bit of practice, you can create beautiful, intricate designs that will make your ceramic pieces truly unique. Whether you prefer geometric patterns, floral designs, or abstract art, dot painting offers endless possibilities for creativity. Enjoy your artistic journey and the satisfaction that comes with each carefully placed dot.
For those interested in further exploring pottery, consider joining a pottery class for adults or signing your kids up for our pottery classes for kids. Additionally, check out our pottery painting classes to refine your skills.
For more tips and inspiration, you can visit the Vancouver Art Gallery, which offers a wealth of resources on various forms of art.
Frequently Asked Questions (FAQs)
- What type of paint should I use for dot painting on pottery? For dot painting on pottery, acrylic paints are typically recommended. They adhere well to ceramic surfaces and offer vibrant colors. Make sure to use paint specifically designed for ceramics to ensure durability.
- Do I need to seal my dot-painted pottery? Yes, sealing your dot-painted pottery is important to protect the design. Use a clear acrylic sealer or varnish to provide a protective layer. This will also enhance the colors and make your design last longer.
- Can I use dot painting techniques on glazed pottery? Yes, you can use dot painting techniques on glazed pottery. However, it’s essential to use paint that adheres well to glazed surfaces. Acrylic paint designed for ceramics works well, and a sealer can help ensure the longevity of your design.
- How do I fix mistakes in my dot painting? If you make a mistake, you can often fix it by gently scraping off the paint with a toothpick or a small knife before it dries. For dried paint, you can paint over the mistake with your base color and start again once it’s dry.
- Can dot painting be used for functional pottery pieces? Dot painting is best suited for decorative pottery pieces. While it can be used on functional items, the paint may wear off with frequent use or washing. If you want to use dot painting on functional items, ensure they are properly sealed and handle them with care.


